
Adding a company logo
This function is available from the application settings. See how to access application settings.
Follow the instructions below to add a new company logo:
1. Go to the Appearance section of the application settings.
2. In the Appearance settings, under Company logo, press Choose a logo to open a system file browser
![]()
3. In the file browser, choose a suitable image and press Open.

4. The file browser automatically closes, and you are returned to the application settings, where you will see a preview of your chosen image. Your chosen image is now set as the company logo, which appears on the top right of the Launcher home screen.
![]()
5. You may close the application settings. If you wish to change the company logo, press Remove and start again from step 2.
Adding a background
This function is available from the application settings. See how to access application settings.
Changing background using a gallery image
Follow the instructions below to change the home screen background using a gallery image:
1. Go to the Appearance section of the application settings.
2. In the Appearance settings under Background image, choose any gallery image by pressing once on any of the preview images from the list.
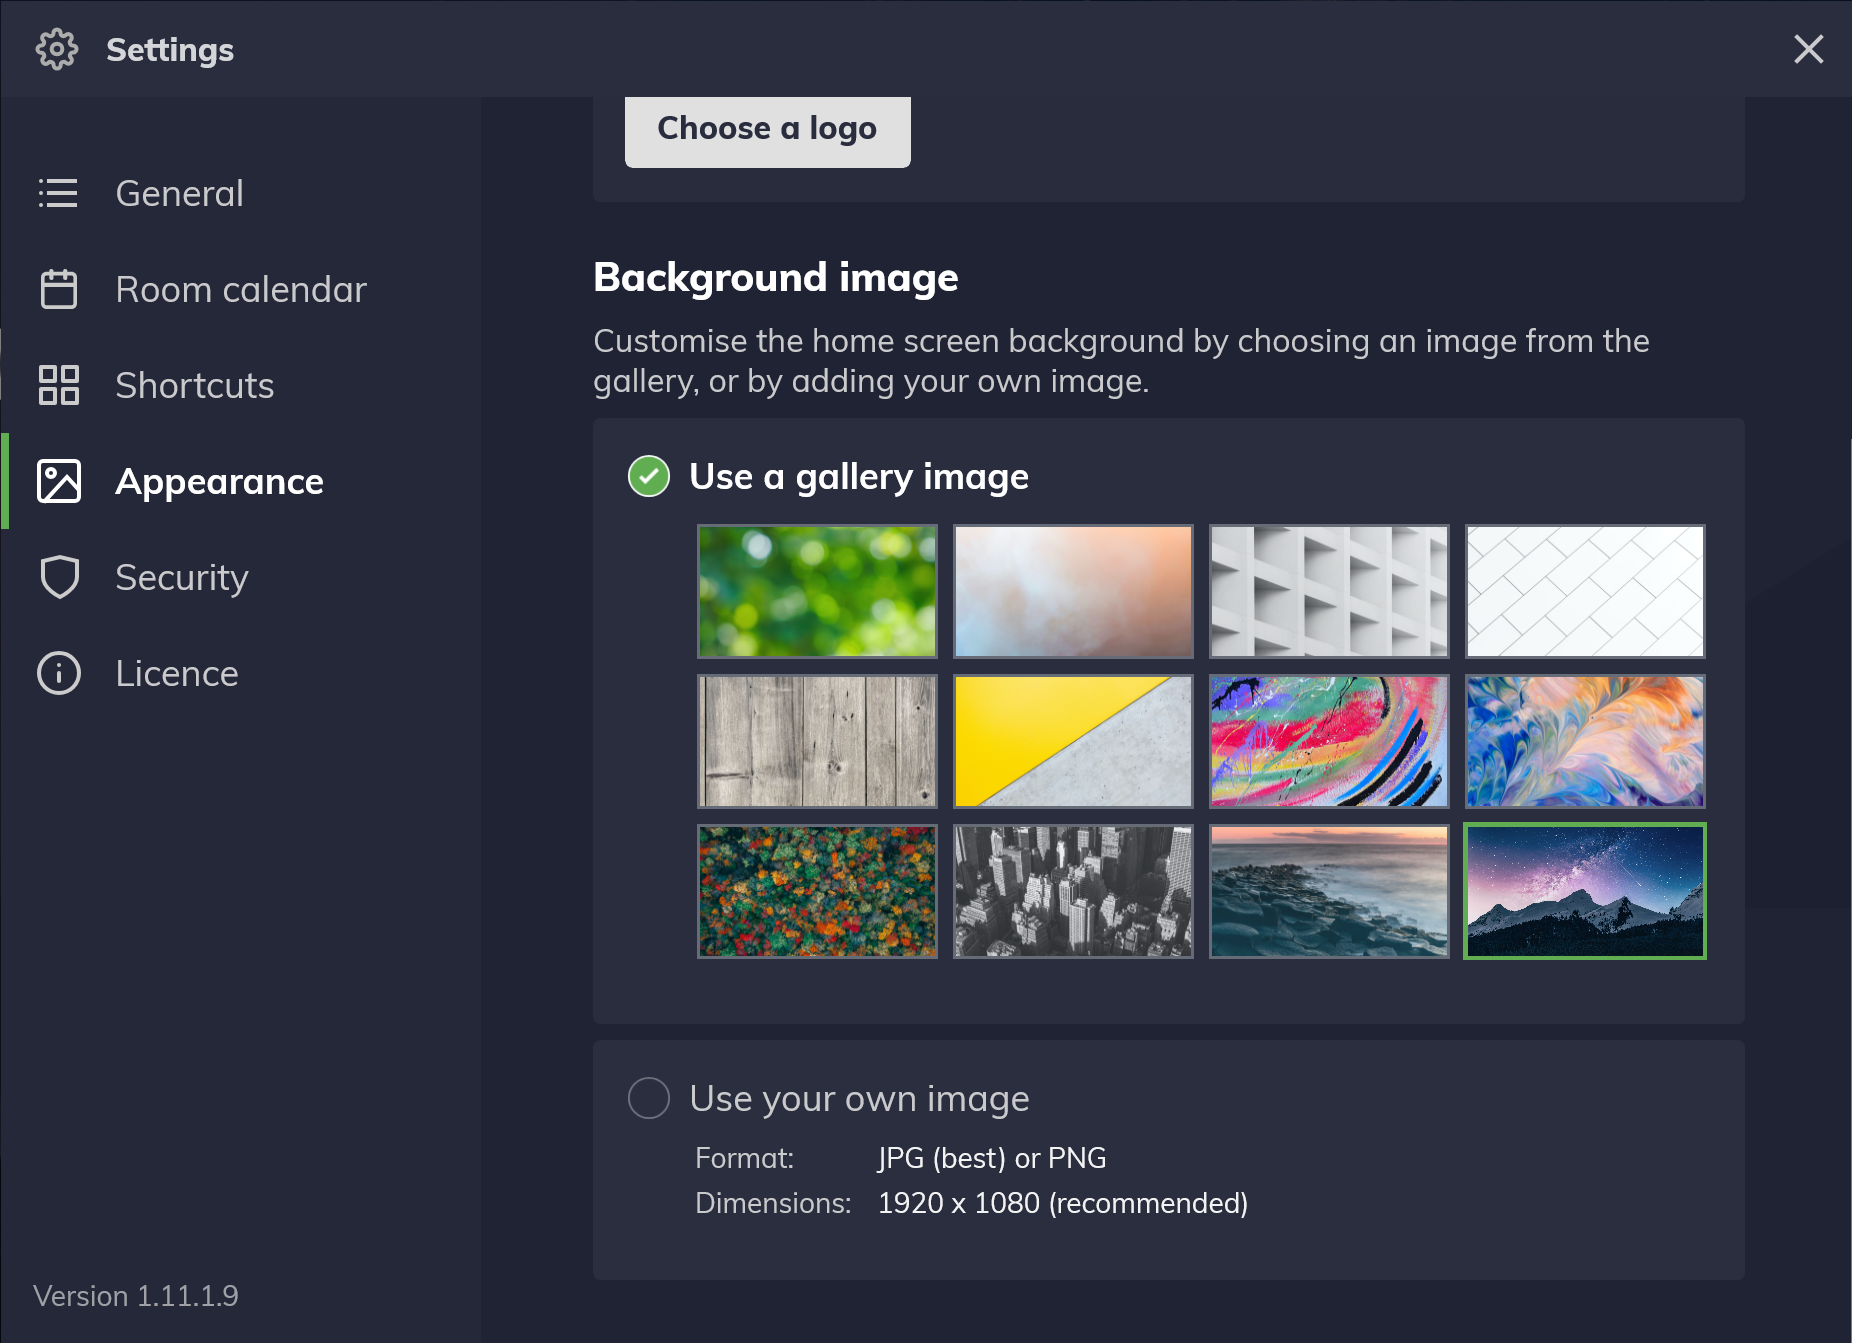
3. Your home screen background has changed based on your gallery image selection. You may close the application settings.
Changing background using a gallery image
Follow the instructions below to change the home screen background using a custom image:
1. Go to the Appearance section of the application settings.
2. In the Appearance settings under Background image, press anywhere within the area labeled Use your own image to open a system file browser.
3. In the file browser, choose a suitable image and press Open.
4. The file browser automatically closes, and you are returned to the application settings, where you will see a preview of your chosen image. Your chosen image is now set as the home screen background.

5. You may close the application settings. If you wish to change the company logo, press Remove and start again from step 2.
Comments
0 comments
Article is closed for comments.